
Xfinity Change Wifi Security
Changing WiFi Security Settings on Xfinity Routers
As a cybersecurity researcher, I emphasize the importance of regularly updating and securing your home network’s WiFi settings to prevent unauthorized access and protect sensitive information.
Accessing Xfinity Router Settings
To change WiFi security settings on an Xfinity router, start by accessing the router’s login page. Open a web browser and enter http://10.0.0.1 in the address bar. This will take you to the Xfinity router login page.
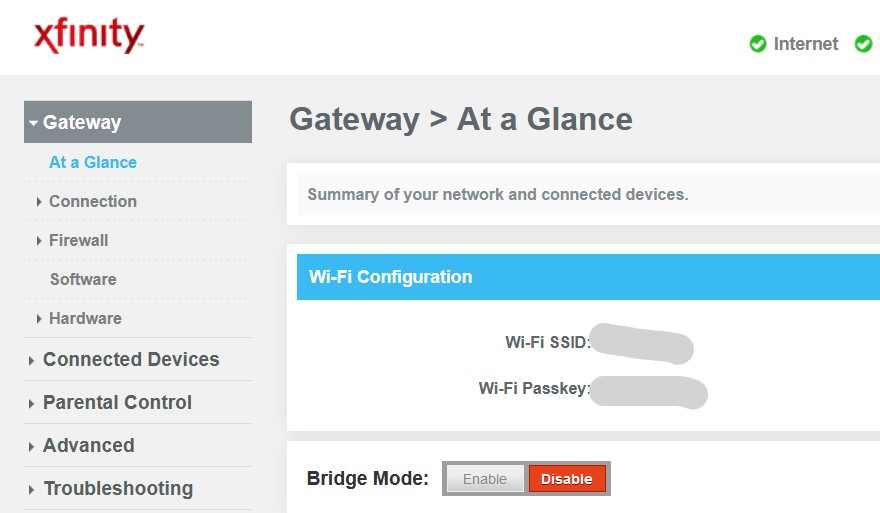
Logging In and Navigating to Security Settings
Enter your login credentials. If you’ve never changed your login information, the username is probably “admin” and the password is “password”. Once logged in, look for the tab or section labeled “Security” or “Security settings”.
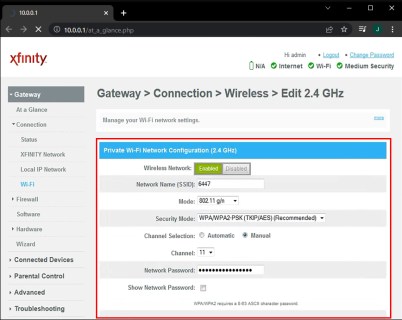
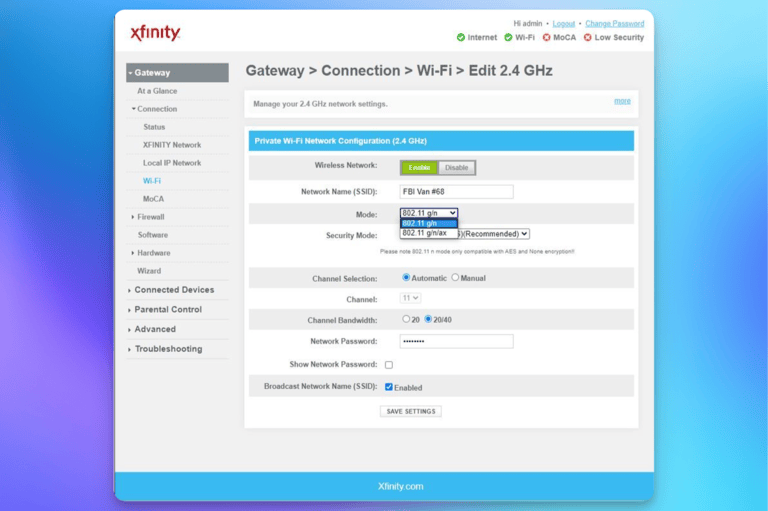
Changing WiFi Password and Updating Firmware
Within the security settings, look for the option to change the WiFi password. Enter a new strong password and be sure to save your changes. Additionally, check if firmware updates are available for your router and follow the instructions to download and install the necessary updates.
Enabling Firewall and Setting Up Parental Controls
Look for the option to enable firewall in security settings and make sure to turn it on. The firewall will help protect your home network from unwanted intrusions. If you have kids at home, consider setting up parental control features on your router to filter unwanted content and limit online time.
Saving Changes and Restarting the Router
Once you have made all the security settings, be sure to save the changes and restart your router to apply the new settings.
Conclusion
Regularly updating and securing your Xfinity router’s WiFi settings is crucial to protect your home network from potential threats. By following these steps, you can ensure a more secure online experience for yourself and your family.